Growing up I can count on one hand the number of times I had a Pop Tart. It was only on the insistence of my younger brother that Mom relented and I was introduced to the light and flaky toaster delight. It was a good thing I wasn’t in charge of the grocery shopping, or else like Lorelei and Rory, Pop Tarts would have become a breakfast staple. Inspired by the Gilmore Girls (I’ve been re-visiting the show in preparation for the release of the new season!) I thought it might be fun to try my hand at Homemade Pop Tarts, just in time for back school season.
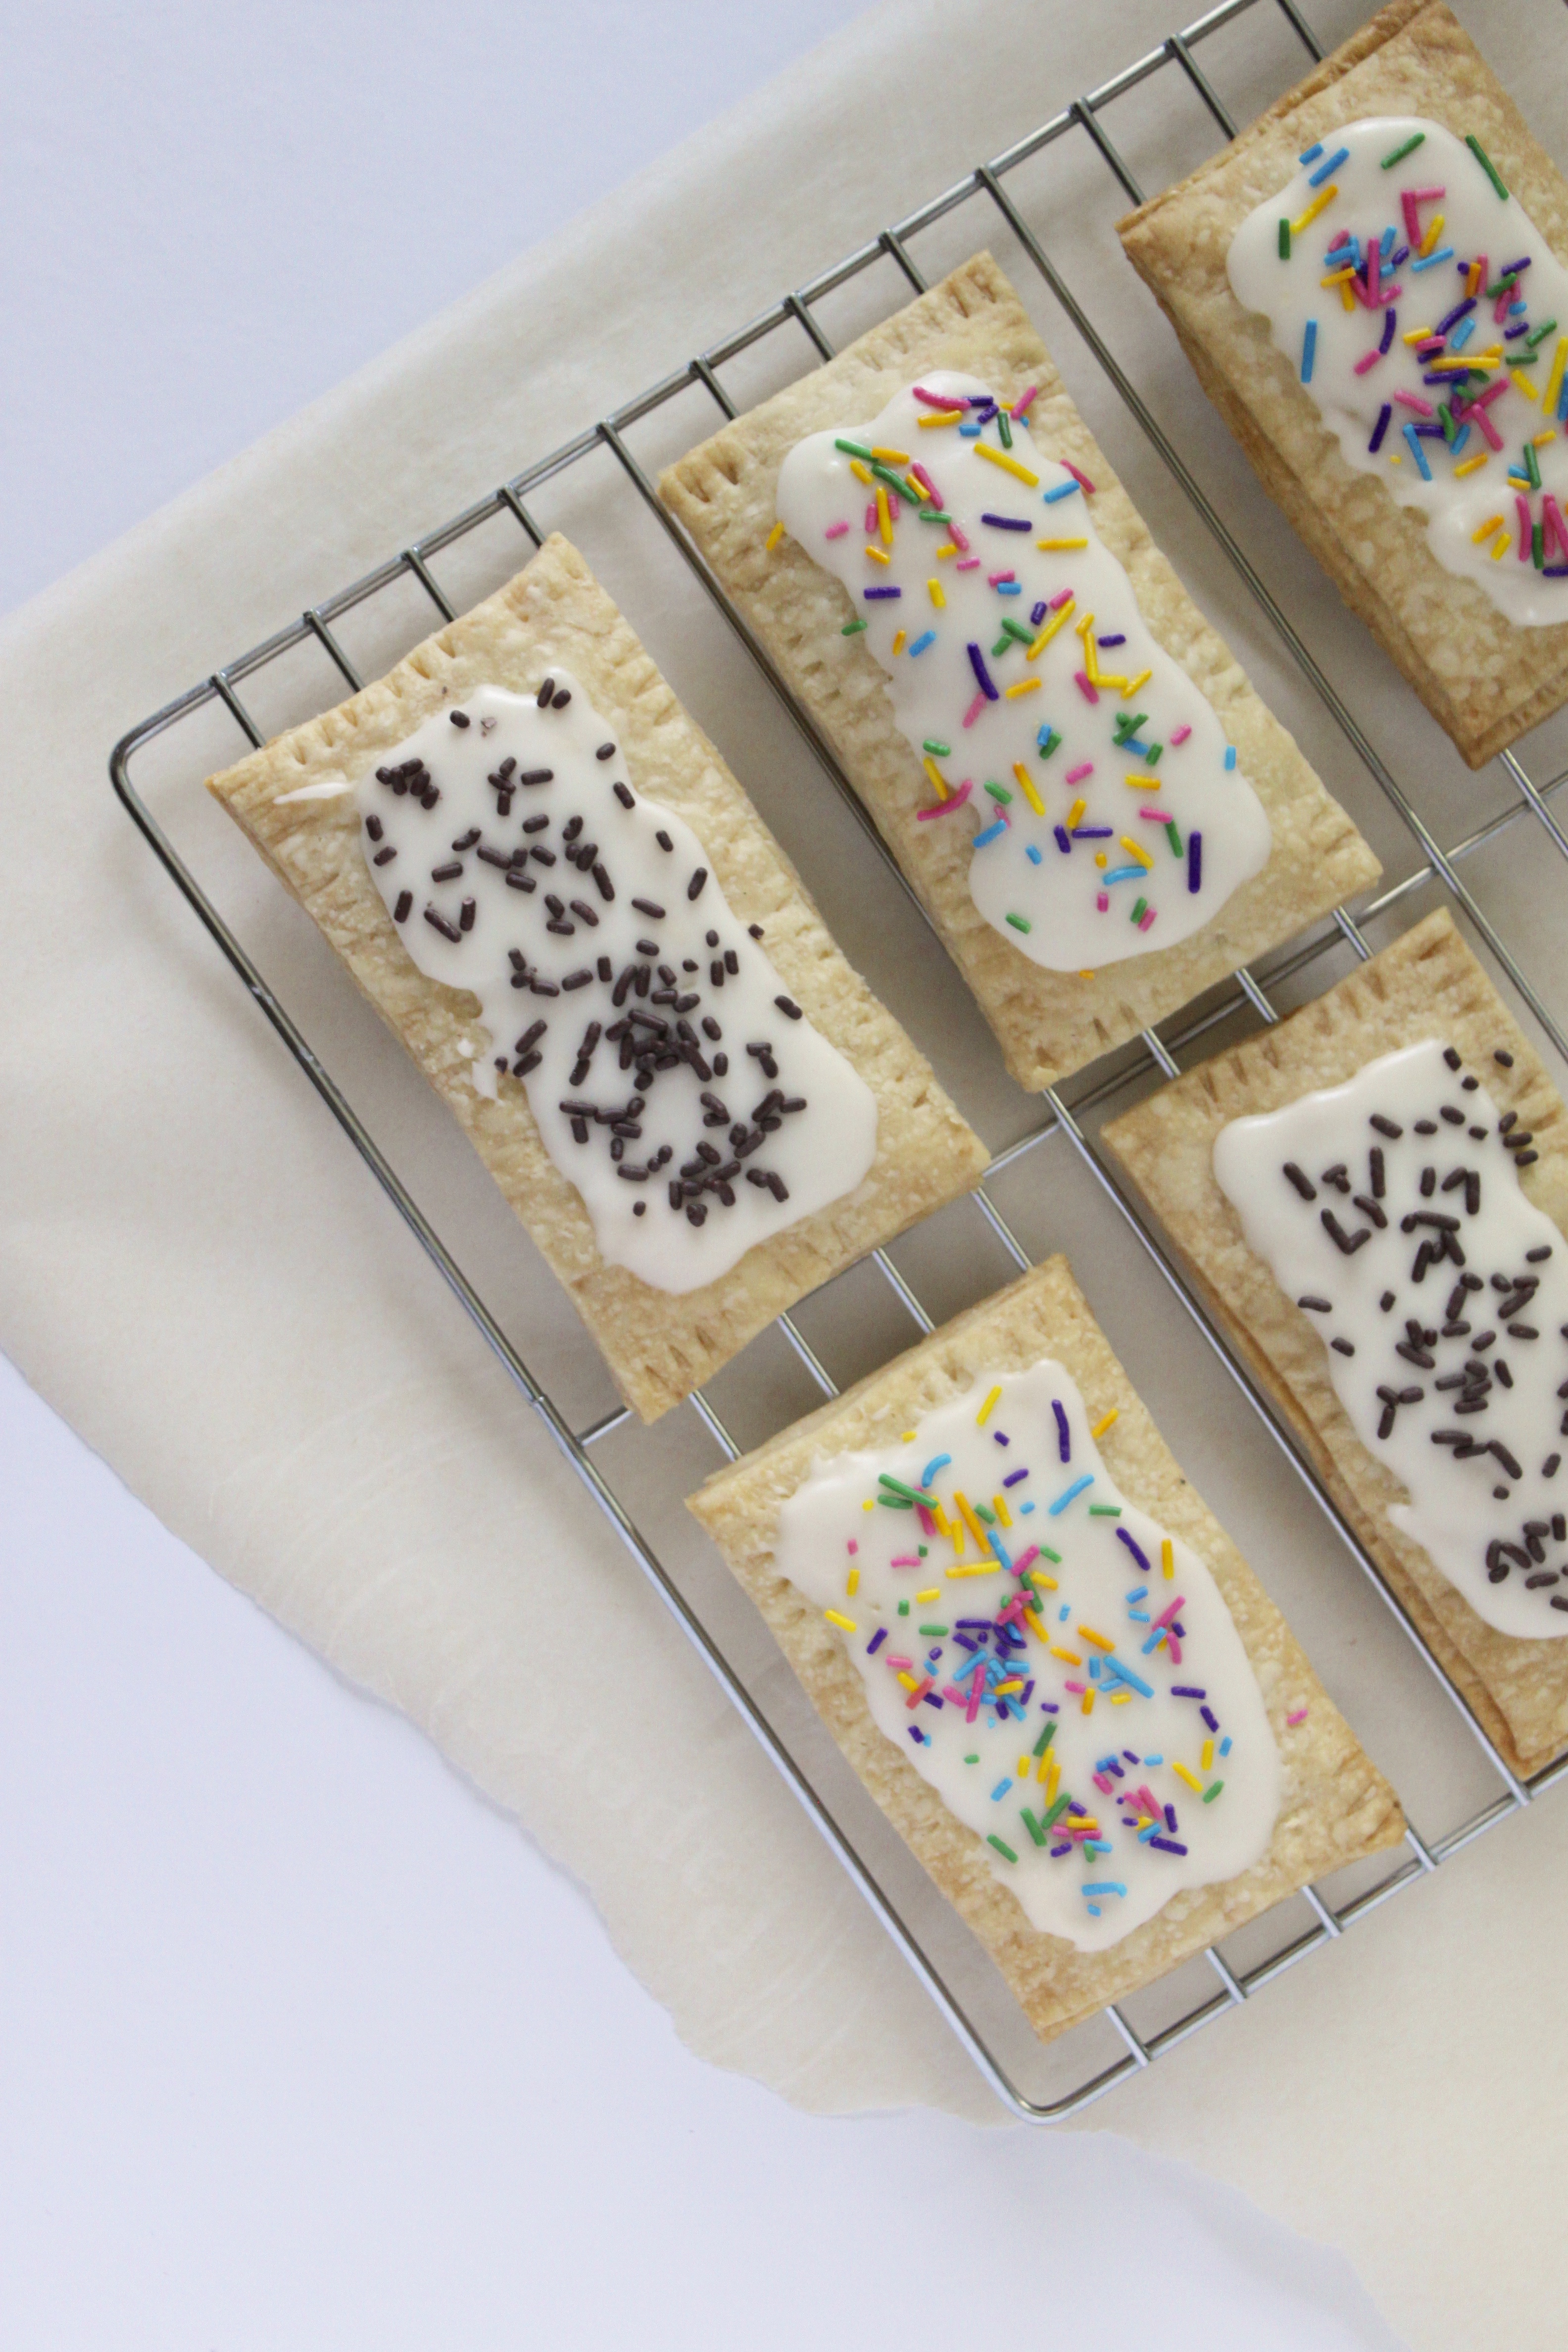
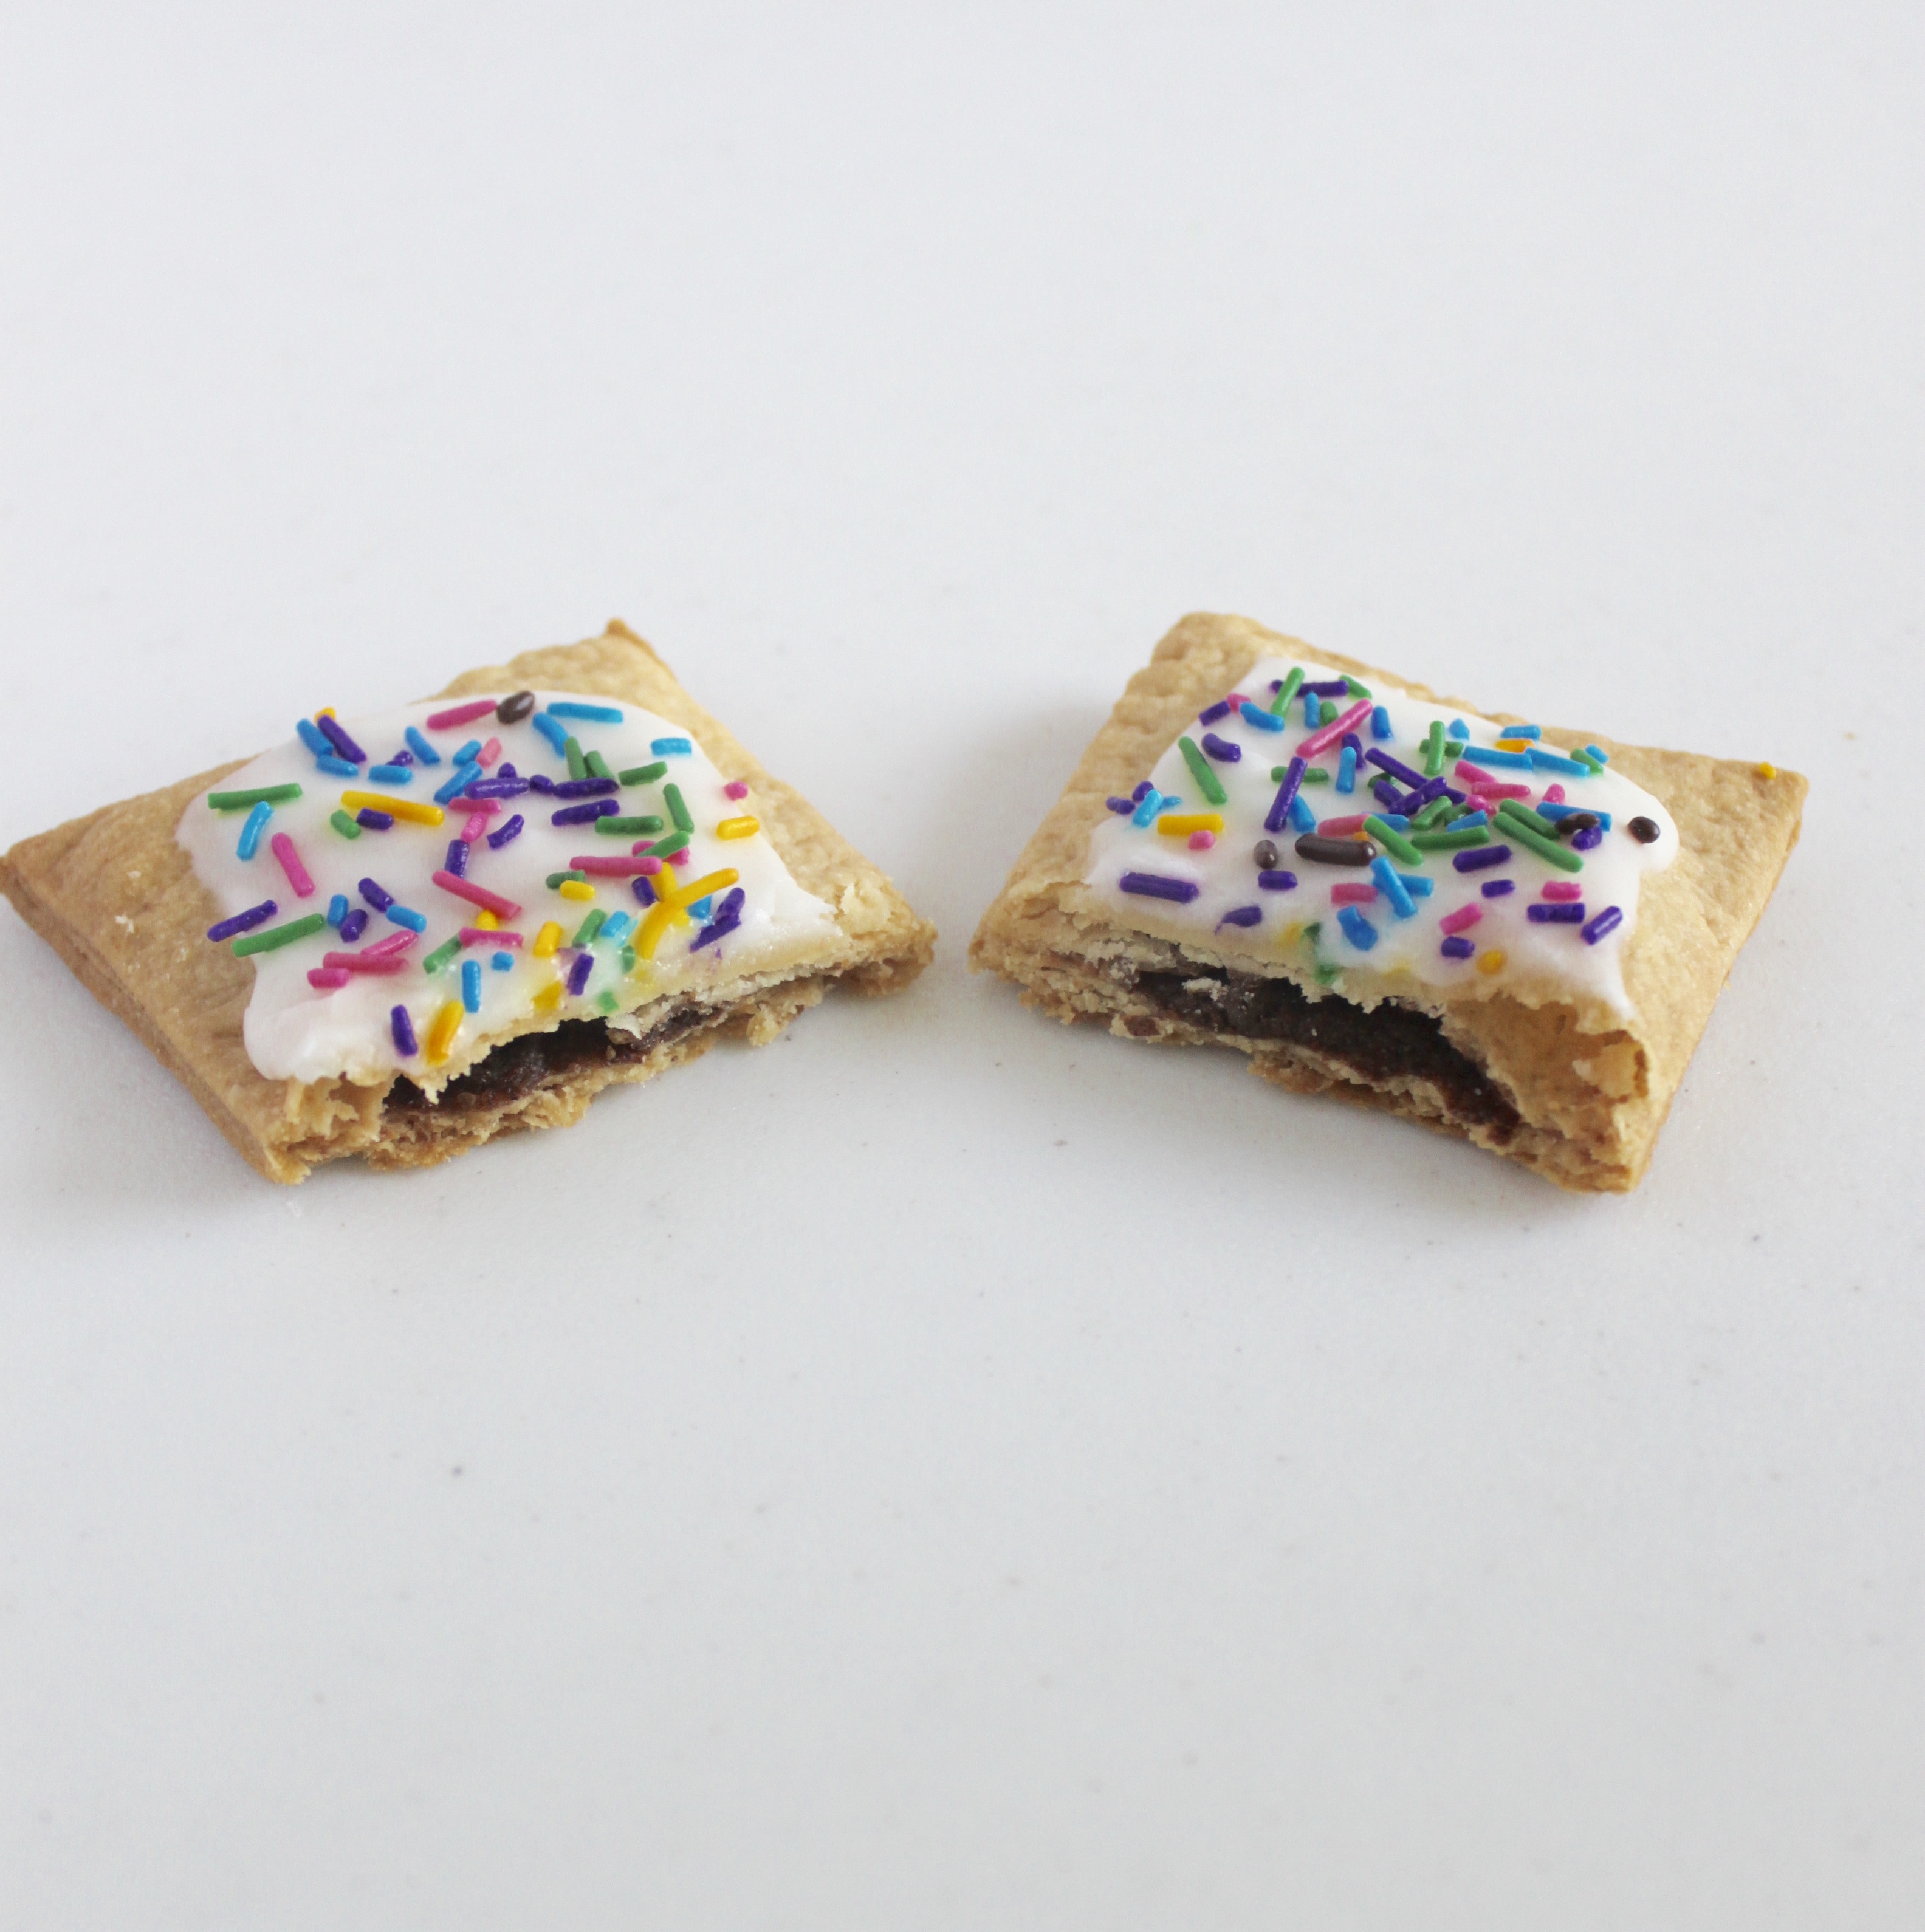
The Pop Tarts I sampled as child, were usually of the strawberry variety, but I thought I would spice things up and make three different flavours – Nutella, Cinnamon and Strawberry. However some things never change, I have to say Strawberry was once again my favorite.
While not as pretty as the ones found in the grocery store, they taste delicious and are lighter and flakier than the boxed variety, so no toasting required! In fact I’m not sure the would stand up to a toaster, I feel like the glaze would melt and make a mess. I was a little nervous about the filling oozing out, so I was too little light handed in this first batch, next time I’ll definitely be much more generous!
Have you made homemade Pop Tarts before? I’d love to hear if you have or if you give this recipe a go, how it turns! Feel free to comment below.

Ingredients
Pastry
2 cups (8 1/2 ounces) all-purpose flour
1 tablespoon sugar
1 teaspoon salt
1 cup (2 sticks or 8 ounces) unsalted butter, cut into pats
1 large egg
2 tablespoons (1 ounce) milk
Nutella
1 additional large egg (to brush on pastry)
Cinnamon Filling
1/2 cup brown sugar
1 1/2 teaspoons ground cinnamon
4 teaspoons all-purpose flour
1 large egg, to brush on pastry before filling
Jam Filling
3/4 cup jam
1 tablespoon cornstarch mixed with 1 tablespoon cold water
Directions
Jam Filling
Mix the jam with the cornstarch/water in a small saucepan. Bring the mixture to a boil, and simmer, stirring, for 2 minutes. Remove from the heat, and set aside to cool. Use to fill the pastry tarts.
Dough
Whisk together the flour, sugar, and salt. Work in the butter with your fingers, pastry blender or food processor until pea-sized lumps of butter are still visible, and the mixture holds together when you squeeze it. If you’ve used a food processor, transfer the mixture to a large bowl. Whisk the first egg and milk together and stir them into the dough, mixing just until everything is cohesive, kneading briefly on a well-floured counter if necessary.
Divide the dough in half, shape each half into a smooth rectangle, about 3×5 inches. You can roll this out immediately or wrap each half in plastic and refrigerate for up to 2 days.
Assembly
If the dough has been chilled, remove it from the refrigerator and allow it to soften and become workable, about 15 to 30 minutes. Place one piece on a lightly floured work surface, and roll it into a rectangle about 1/8″ thick, large enough that you can trim it to an even 9″ x 12″. Repeat with the second piece of dough. Set trimmings aside. Cut each piece of dough into thirds – you’ll form nine 3″ x 4″ rectangles.
Beat the additional egg and brush it over the entire surface of the first dough. This will be the “inside” of the tart; the egg is to help glue the lid on. Place a heaping tablespoon of filling into the center of each rectangle, keeping a bare 1/2-inch perimeter around it. Place a second rectangle of dough atop the first, using your fingertips to press firmly around the pocket of filling, sealing the dough well on all sides. Press the tines of a fork all around the edge of the rectangle. Repeat with remaining tarts.
Gently place the tarts on a lightly greased or parchment-lined baking sheet. Prick the top of each tart multiple times with a fork; you want to make sure steam can escape, or the tarts will become billowy pillows rather than flat toaster pastries. Refrigerate the tarts (they don’t need to be covered) for 30 minutes, while you preheat your oven to 350°F.
Remove the tarts from the fridge, and bake them for 20 to 25 minutes, until they’re a light golden brown. Cool in pan on rack.
These can be kept at room temperature in an airtight container for a week. If you’d like to make them ahead of time, I would suggest freezing them unbaked between layers of waxed paper, and baking them as you need.


Excellent recipe. I’ve been craving pop tarts ever since I had a pop tart donut. It’s just as delicious as it sounds. :]
// ▲ itsCarmen.com ▲
OMG! A Pop Tart Donut! That sounds amazing! I’ll have to hunt one down in this neck of the woods. Hope you enjoy the recipe!
xx
Neelam