If you’re anything like me, fall and shorter days, means curling up with a warm cup of tea and a good book. Truth be told, I often have many books on the go at the same time! So I’m always misplacing bookmarks or creating make-shift ones out of receipts, business cards, or whatever else I find lying around the house.
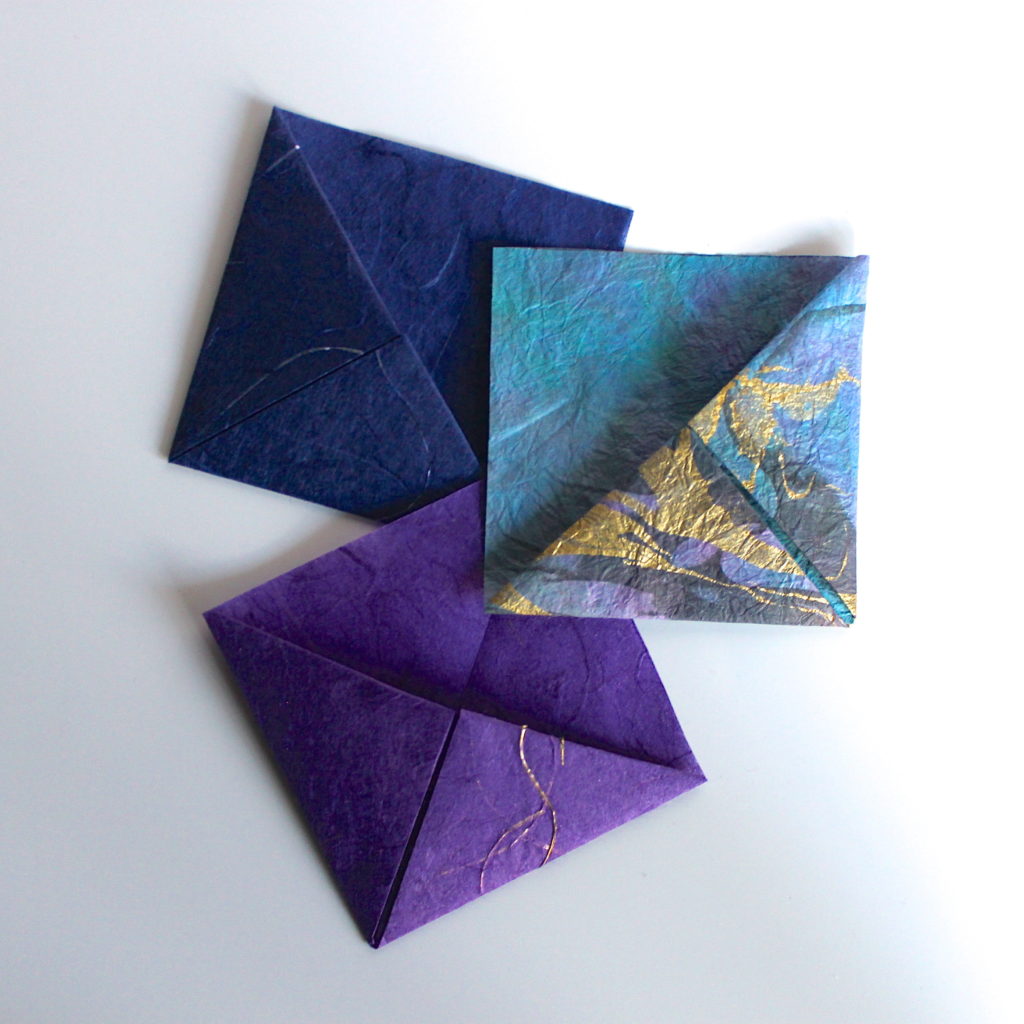
That was until I discovered these easy and beautiful DIY Origami Bookmarks. You’ll never be scrambling for something to stick into a book to mark you spot again!
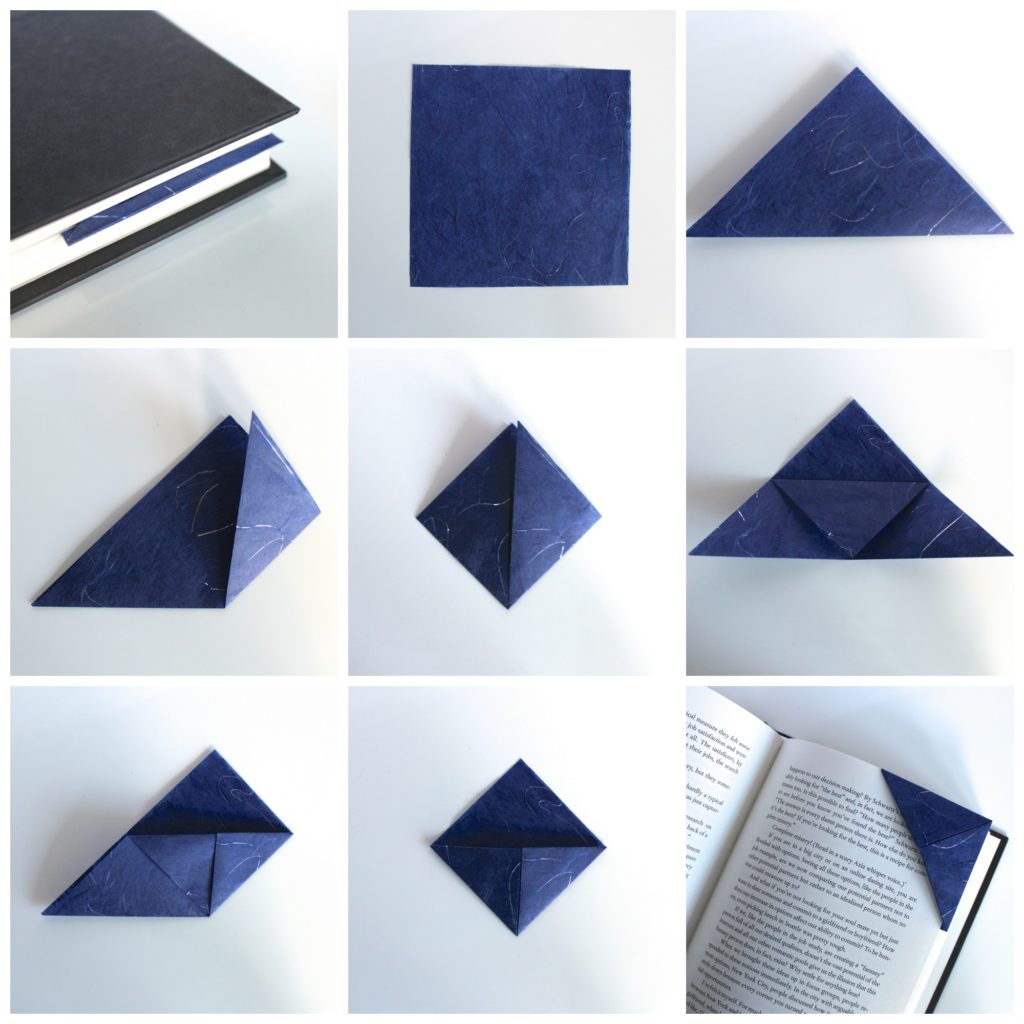
Choose a paper of your choice. I found a lighter paper to work best, so I used a slightly heavier tissue paper.
Cut the paper into a 15×15 cm square.
Fold the paper diagonally so that you have a triangle.
With the apex of the triangle facing away from you, fold the two side points into the middle to create a diamond.
Open the diamond up and fold the appex of the top piece of paper down to the base of the triangle.
The fold the right side point up as if you were making a diamond again, but this time tuck the point into the pocket created. Do the same with the left point and viola, you’ve got a bookmark! Now pour some wine, curl up with a throw and dive into your favorite book.


